If you’re considering replacing your roof in Moore, understanding the process can help you make informed decisions and avoid surprises. From evaluating your current roof to selecting materials and working with contractors, each step plays a crucial role in ensuring a successful upgrade. Knowing what to expect can save you time, money, and stress. Let’s explore the essential stages involved, so you’re prepared to navigate this important project confidently.
Assessing Your Roof’s Condition and Knowing When to Replace
Knowing when to replace your roof starts with a thorough assessment of its current condition. Check for missing, cracked, or curling shingles, which signal damage. Look for granule loss in gutters or downspouts—this indicates aging asphalt shingles.
Examine for moss, algae, or moss growth, as these can weaken your roof’s structure. Notice any leaks, water stains, or damp spots inside your attic or ceilings. Also, inspect flashing and vents for rust or damage.
If your roof is over 20 years old, these signs become more significant. Regular inspections help you catch issues early, preventing costly repairs and ensuring your home stays protected. For professional guidance and a free inspection, you can easily connect with Top View Roofing to evaluate your roof’s condition.
Selecting the Right Roofing Materials for Your Home
Choosing the right roofing materials is essential for making certain of your home’s durability, energy efficiency, and curb appeal. Consider your climate, budget, and aesthetic preferences.
Asphalt shingles are affordable and versatile, while metal roofs offer longevity and energy savings. Tile and slate provide durability and a distinctive look but come with higher costs.
Think about maintenance needs and weight restrictions for your existing structure. Consulting with a professional can help you evaluate options suited for Moore’s weather conditions.
Selecting suitable materials now guarantees your roof performs well, looks great, and protects your home for years to come.
Understanding Local Building Codes and Permitting Requirements in Moore
Understanding local building codes and permitting requirements in Moore is essential to make certain your roof replacement project complies with all regulations. Before starting, check with the Moore building department to identify necessary permits and specific code requirements.
These regulations ensure safety, proper construction, and prevent future issues. Failing to obtain permits can lead to fines, delays, or even needing to redo work.
Familiarize yourself with setback rules, material restrictions, and inspection procedures. Working with a knowledgeable contractor can help navigate these requirements smoothly.
Staying compliant from the start protects your investment and guarantees your roof replacement aligns with Moore’s legal and safety standards.
Finding and Hiring a Qualified Roofing Contractor
Finding a qualified roofing contractor is a crucial step to guarantee your roof replacement is done safely and effectively. Start by asking for recommendations from friends, neighbors, or local suppliers.
Check online reviews and verify credentials, including licensing and insurance. Request detailed estimates from multiple contractors to compare pricing and scope.
Ask about their experience with similar projects and request references. A reputable contractor will provide proof of insurance and a clear contract.
Trust your instincts—choose someone who communicates well, shows professionalism, and demonstrates a thorough understanding of roofing.
Taking these steps helps ensure a smooth, quality roof replacement that protects your home for years to come.
Scheduling the Roof Replacement Project
Once you’ve selected a qualified contractor, the next step is to coordinate a timeline that works for both you and the crew. Reach out to discuss preferred dates and any scheduling constraints. Be flexible if possible, as weather or material availability can affect the schedule.
Confirm the start date, estimated duration, and any necessary preparations. Clear communication helps prevent misunderstandings and ensures everyone’s expectations are aligned. Keep a copy of the agreed-upon schedule handy.
Preparing Your Home for the Roofing Process
Before the roofing work begins, it’s essential to prepare your home to guarantee safety and efficiency. Clear the driveway and pathways of vehicles, tools, and debris to ensure easy access for workers and equipment.
Trim overhanging branches that could interfere with the roof or cause damage during installation. Secure or move outdoor furniture, decorations, and fragile items away from the work area.
Cover landscaping, outdoor AC units, and delicate plants to protect them from dust, debris, and falling materials. Inform your household about the project to avoid accidents and make certain everyone stays clear of the work zone.
Proper preparation minimizes disruptions and keeps everyone safe.
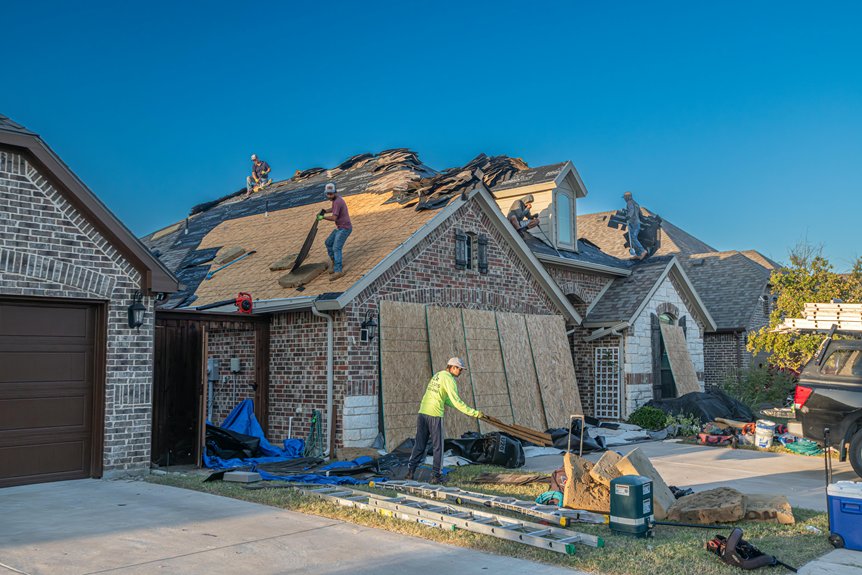
The Removal of the Old Roof and Site Preparation
With your home prepared and the work zone cleared, the next step is to carefully remove the existing roof. Your roofing team will start by stripping away shingles, flashing, and underlayment, exposing the underlying structure.
They’ll inspect the deck for damage or rot, replacing any compromised wood. This process creates a clean, stable surface for your new roof.
Proper disposal of debris guarantees safety and avoids mess. Once the old roofing materials are removed, the site is thoroughly cleaned and prepped, making sure everything is ready for the installation of your new roofing system.
This careful process sets the foundation for a durable, long-lasting roof.
Installing the New Roofing System
After the old roofing materials have been removed and the deck is inspected and repaired, your roofing team begins installing the new system. They lay down a waterproof underlayment to provide an extra layer of protection against leaks.
Next, they carefully position the new shingles or roofing panels, ensuring proper alignment and secure fastening. The team works systematically across your roof, checking each section for consistency and quality.
They also install flashing around chimneys, vents, and valleys to prevent water intrusion. Throughout this process, they maintain a clean workspace, minimizing debris and ensuring the new roof is installed efficiently and accurately for long-lasting performance.
Final Inspection and Quality Checks
Once the new roofing system is installed, your roofing team moves on to the final inspection and quality checks. They carefully examine every aspect of the installation, ensuring shingles are properly aligned, sealants are secure, and flashing is correctly installed.
They also look for any signs of damage or defects that could compromise your roof’s performance. This step guarantees your roof meets safety standards and manufacturer specifications.
If any issues are found, they address them promptly. Once everything passes inspection, they provide you with a detailed report and finalize the project, giving you peace of mind that your new roof is durable and properly installed.
Maintaining Your New Roof for Longevity
Proper maintenance is essential to guarantee your new roof stays in top condition for years to come. Regularly inspect your roof for damaged or missing shingles, especially after storms.
Keep gutters clean to prevent water buildup, which can cause leaks or damage. Trim overhanging branches to avoid roof damage from falling debris.
Address minor issues promptly to prevent them from worsening. Schedule professional inspections every few years to catch potential problems early.
Maintain proper attic ventilation to reduce moisture and extend your roof’s lifespan. By staying proactive, you ensure your investment endures, saving you money and hassle in the long run.
Conclusion
Once your new roof is installed, stay proactive with regular inspections and maintenance to keep it in top shape. Address any issues promptly to extend its lifespan and protect your home. For more information on how to schedule your free roof inspection, call us at (405) 543-2920 or visit us online at Top View Roofing. By choosing the right materials, hiring a qualified contractor, and following proper procedures, you guarantee your investment lasts for years to come. Keep up with routine care, and you’ll enjoy a safe, durable roof that adds value and peace of mind to your Moore home.