When planning a roof replacement for your El Reno home, understanding the typical timeline can help you prepare and set realistic expectations. The process usually takes between two to five days, depending on factors like roof size, complexity, and weather conditions. From initial inspections to final cleanup, each step plays a vital role in ensuring a successful project. Curious about what each phase involves and how long it might take your specific home?
Initial Inspection and Planning
Before starting your roof replacement, it’s essential to conduct a thorough initial inspection and planning. Walk around your home, checking for damaged or missing shingles, leaks, or sagging areas. Note any areas needing urgent repair.
Assess the roof’s age and condition to determine if a full replacement is necessary. Measure the roof’s dimensions accurately to estimate materials and costs.
Review local building codes and permits required for the project. Setting a clear budget and timeline early helps avoid surprises.
Planning ahead ensures you understand the scope, prioritize repairs, and coordinate with professionals effectively, making the entire process smoother and more efficient. For expert advice and assistance, consider contacting Top View Roofing to schedule a free inspection and get professional guidance.
Material Selection and Ordering
Choosing the right materials is a critical step in your roof replacement, as it directly impacts durability, appearance, and long-term value. You’ll want to take into account factors like weather resistance, style, and budget.
Once you’ve selected your preferred materials, you’ll need to place your order with your supplier early enough to ensure timely delivery. Confirm inventory availability and delivery schedules to avoid delays. Keep in mind that custom or specialty materials may take longer to arrive.
Proper planning and communication with your supplier help ensure your materials arrive on time, keeping your project on schedule and minimizing unexpected setbacks.
Actual Removal and Replacement Process
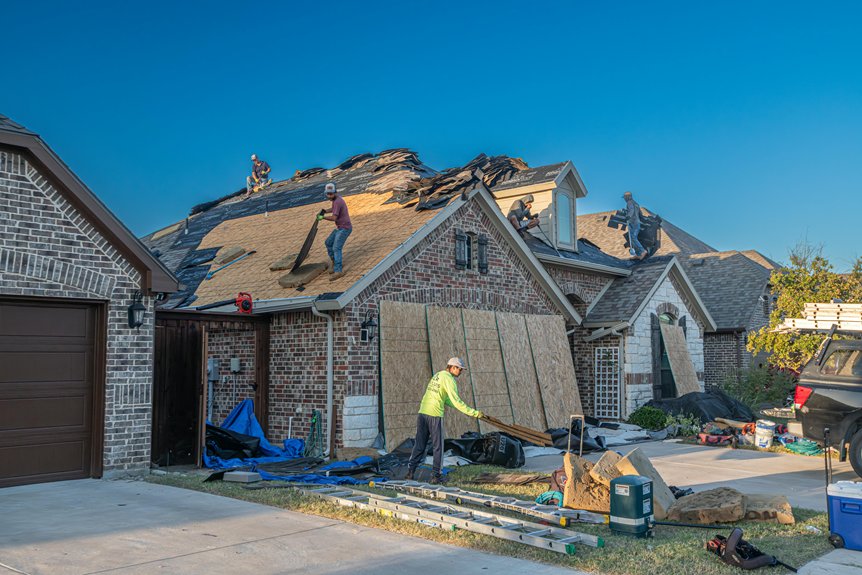
Once your materials arrive, the removal and replacement process begins with preparing the work area and protecting your property. You’ll clear the yard of any obstacles and cover nearby landscaping to prevent damage.
The old roof is then carefully stripped away, starting from the top down, revealing the underlying structure. As shingles and debris are removed, you’ll notice the roof deck becomes visible.
Once the old materials are cleared, the new roofing components—underlayment, shingles, and flashing—are installed methodically. Throughout, you stay involved to ensure proper placement.
The process is efficient, but safety remains a priority to minimize hazards and safeguard your home during the replacement.
Final Inspection and Cleanup
After the new roofing materials are installed, attention shifts to the final inspection and cleanup. You’ll walk around your home with the contractor, checking that everything looks correct and that no debris remains.
They’ll clean up nails, old shingles, and dust, ensuring your yard is safe and tidy. The inspector will examine the roof for quality, proper installation, and any potential issues.
Once approved, the contractor will remove safety equipment and tools. This final step guarantees your roof is secure and your property is clean, marking the completion of the project.
You can now enjoy your new roof with peace of mind.
Project Completion and Follow-Up
With the project officially complete, it’s important to review the work with your contractor and verify all aspects meet your expectations.
Walk around your home and inspect the new roof for any issues, like missing shingles or damage. Discuss any concerns immediately to ensure they’re addressed promptly.
Keep detailed records of the work, including warranties and contractor contact information.
Schedule a follow-up visit if needed to confirm everything is in order.
Once satisfied, formally close out the project by making final payments.
Proper follow-up guarantees your roof remains protected and your investment is well-maintained for years to come.
Conclusion
Once your roof replacement is complete, it’s important to do a final walkthrough to ensure everything looks good. The entire process typically takes between 2 to 5 days, depending on your home’s size and weather conditions. Staying in close contact with your contractor can help everything go smoothly. For more information on how to schedule your free roof inspection, call us at (405) 543-2920 or visit us online at Top View Roofing. With proper planning, you’ll enjoy a durable, beautiful new roof that protects your home for years to come.